Macaws:
Red Shouldered (Hahn's) Macaw
Severe Macaw
Blue And Gold Macaw
Blue Throated Macaw
Military Macaw
Red Fronted Macaw
Scarlet Macaw
Green Winged Macaw
Hyacinth Macaw
A lot of people have been asking me about Kili and how come I've been making few posts/videos lately. The truth is, I'm just taking it easy on the birds for now. Truman is finally eating, back in his cage, and moving about but he still limps pretty badly. I maintain the tricks he knows but don't think it's a good idea yet to start working on new ones. Meanwhile Kili is still going through the heavy stages of her second molt. She looks kind of scraggly and she has been nippy lately. With so many wing feathers missing, right now it's more important for me to promote good nutrition and avoid feather breakings so that she could fly again.
I don't make Kili fly much and only practice old tricks with her when she's up for it. Believe it or not, every few days she just really wants to do tricks (even though she isn't hungry) so I give her a chance to run through her routine. Though not in 2 minutes, she does get through all the tricks she knows in under 5 minutes at a leisurely pace. She definitely remembers everything and knows what to do very well.
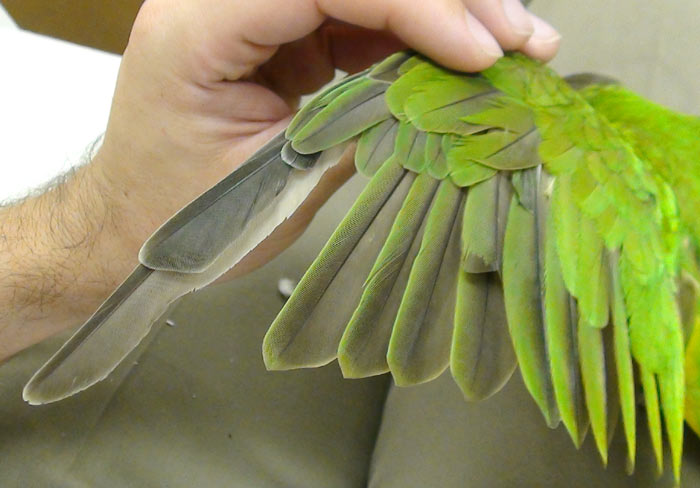
Kili currently has 2 primaries growing in on her bad wing and one primary on the good one. She also has some secondaries as well as many body feathers coming in now all at once. I'm feeding her a near 100% Roudybush pellet diet in abundance. I'm avoiding feeding her much seeds or fresh foods as they would dilute the high nutrition of the pellets. Between molts I believe the fresh foods help keep the weight in check but right now I really need her to grow back strong healthy feathers.
You can see that Kili is missing a lot of primaries but 2 new ones are growing in.
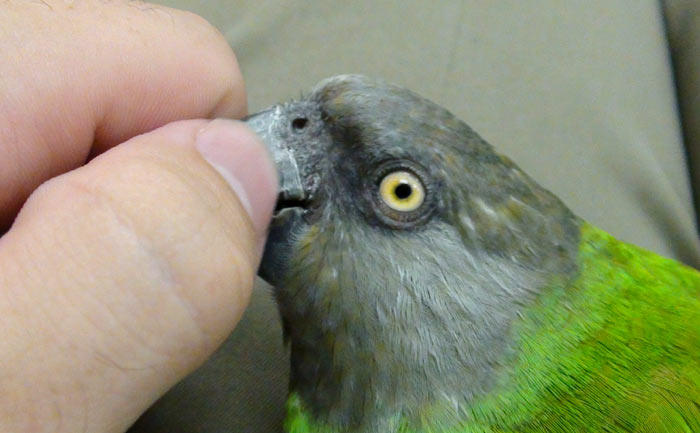
Kili really likes to get scratches on her head and beak when she's molting
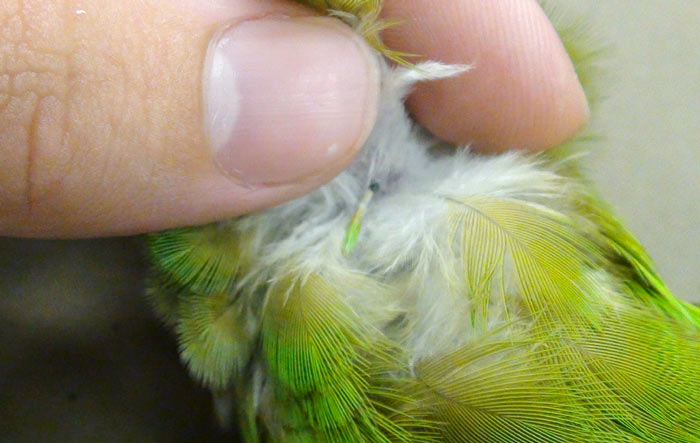
Close up view of a pin feather on Kili's head
When Kili is molting she cycles between phases of being really nippy and really cuddly. It seems that the molt goes on in phases. First she loses a lot of feathers, then stops losing feathers while the previous set grows in, then she begins losing feathers again. She's nippy between the feather loss and pin feathers coming out stage but then she gets super cuddly and is always begging for scratches when the pin feathers have matured. I roll the pin feathers on her head between my fingers to help break them open for her.
In this video you can see a comparison of Kili's good and bad wing, see how her new primaries are growing out, watch me scratching her head and beak, see a pin feather up close, and see how I rub the feather between my fingers so it comes open. If you listen really closely, you can even hear Kili purr in delight.
The first time I heard that someone else's Senegal Parrot could crack almonds, I was simply astonished. It just did not seem to me by the look of that beak that a Senegal could take an entire almond shell in its beak and snap it in half like a nut cracker. Likewise I was surprised that my Cape Parrot with quite a suitably sized beak for the job couldn't crack almonds either. Read on to find out how I taught both of my parrots to crack almonds on their own and how my Cape Parrot can even crack open a walnut now.
At first though I could give the parrots a nut and they would play a little bit but then eventually discard it. They were not motivated to spend a lot of effort chewing the nut because they were unaware of the fantastic reward inside. This is where I needed to provide some help.
I learned that baby parrots do not come with the knowledge required to just break open a nut so some assistance is required on our part. The first step is to introduce the parrot to the food within the shell itself. By letting the parrot play with it, it will quickly realize that it tastes good and want more. The next step is to let the parrot play with the shell. Parrots are destructive and naturally enjoy breaking things so no doubt they will enjoy chewing up the shell itself. Use a nutcracker to break a nut and just give the shell to the parrot to experiment with.
Next start introducing the parrot to the concept that there is a tasty nut inside of the shell and it requires breaking open. At first try to break the nut directly in half and let the parrot eat the nut out of the half shell. Once it is has figured this out, you should be able to crack the nut progressively less and less until you no longer need to crack it at all. When introducing your parrot to its first uncracked nut, try to find the smallest one possible and that has some defects pre existent in the shell (such as small chips/cracks). If the parrot can succeed at breaking an easier nut on its own, it will be more motivated to spend long spans of time working on the difficult ones.
It turns out that my Senegal Parrot can crack open an almond and my Cape Parrot can even crack open a walnut. I realized that they do it somewhat differently than a nutcracker. Instead the parrots learn to chew open a hole in one side of the nut and then use the tip of their beak to scoop out the nut from inside or chew the hole wider. This is why parrots can still eat a nut that would otherwise seem too large to break with their beak. So go ahead and give it a try and just make sure that the parrot continues being rewarded all along the way.
This process probably happens naturally in the wild. Young parrots learn about nuts and difficult to reach foods by watching other parrots eating them. Furthermore the juveniles can find leftovers discarded by older parrots and nibble out what's left from the shells cracked by adults. We can simulate this same process by letting them watch us consume nuts and pre-cracking some for them to try.
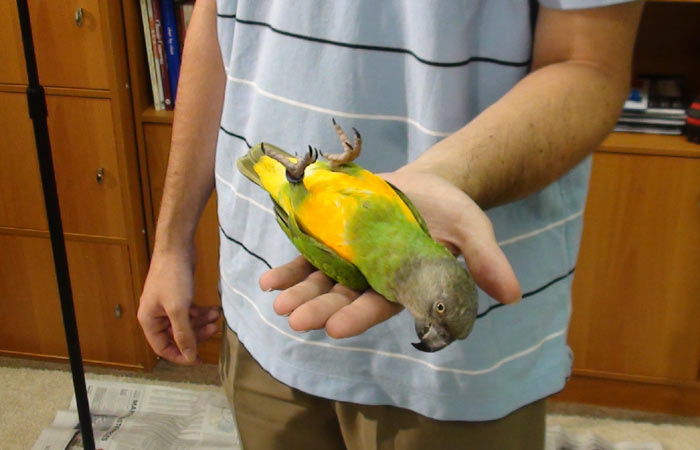
I just wanted to share in a single post/video a demonstration of Kili's tameness. I realize that people have seen bits and pieces of it here and there but I wanted to consolidate it all to one place. I continue practicing all of these taming techniques from time to time to maintain tameness. I just casually touch or grab her in different ways so that she remains very used to hands. To learn a bit about beginning this taming process, check out this article.
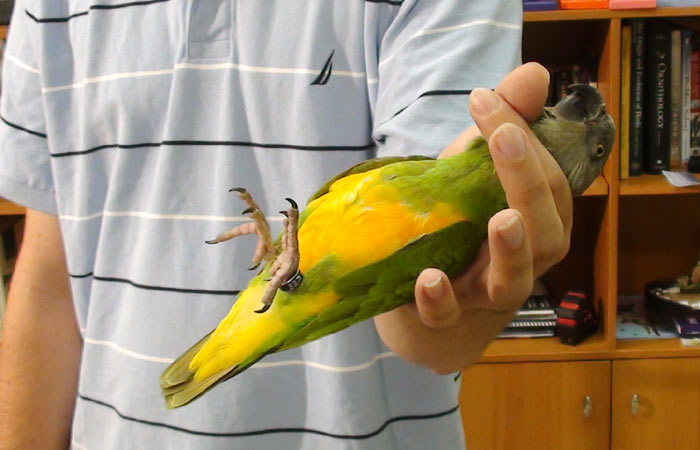
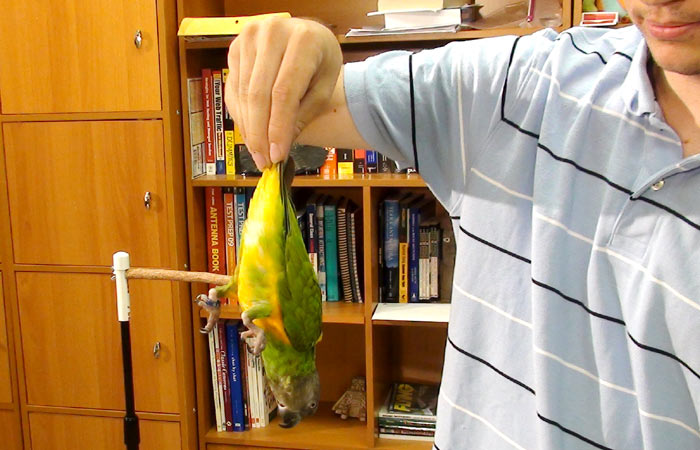
I can touch Kili anywhere including the places parrots tend not to like being touched like under the wings and tail. Also I can grab/hold Kili by anything. Obviously I can grab by her feet but also can grab by her back or neck. She doesn't mind being grabbed by the head and I'm sure it doesn't hurt her because I see her hanging by her beak alone from time to time. Kili lets me pull her wing and tail feathers open. Most impressively Kili let me grab and hold her by the tail. This requires absolute trust. Here are some pictures and video:
For anyone wondering how to touch your parrot's beak or what is the best way to develop personal confidence handling a biting parrot, this article should be particularly helpful. This is a taming technique I have rarely seen discussed but has helped me personally with all parrots I've ever interacted with. This taming method is for everyone beginner through expert and can be used on any parrot from tame to aggressive as long as you can safely approach the parrot. This should apply to all parrot species except for the smallest ones.
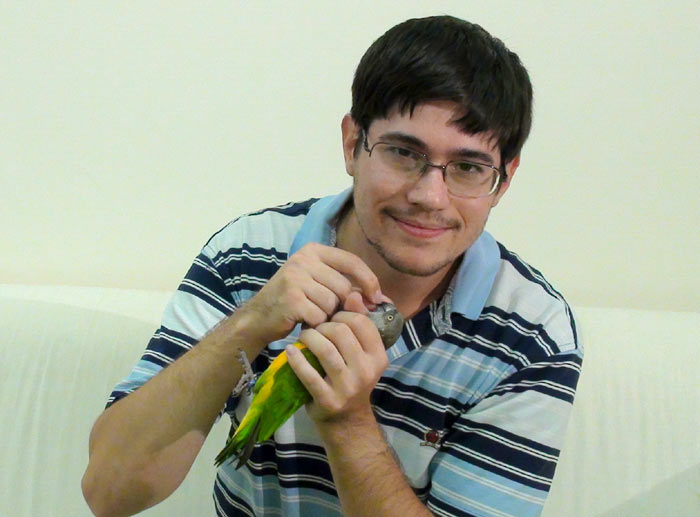
This incredible parrot taming technique is beak touching. The first step of hand taming a parrot is to be able to touch it without getting bitten. The only place on the parrot's entire body that you can safely touch and not get bit is the maxilla. This is the upper beak on a parrot. The reason you cannot get bit when touching the maxilla is because you are too far from the mandible (bottom beak) but too close for the parrot to be able to move and get your finger in its beak. By touching the upper maxilla, you are safely out of range of getting bit. Touching the parrot's head, tail, wings, feet, or head are far more likely to result in a bite if it isn't accustomed to being touched. And don't think you can touch its back. Parrots can turn their head over 180 degrees and will bite behind them in a flash.
When familiarizing myself with a parrot that I'm uncertain of, I like to start by touching its beak and seeing how it reacts. First as I approach my hand slowly towards its beak (from the front and above), I am gauging the body language and trying to see if it is aggressive or calm. I check to see if the parrot opens its beak and leans in for my hand or stays still. I continue holding my hand above and just far enough that there is no way the parrot can reach to bite. Then I move steady and deliberately right to the upper maxilla and put my hand or finger on it. I like to get my thumb and index finger around the beak and kind of hold on. I may add a scratch from my finger nail. The parrot cannot bite me in this position and I can safely retract my hand upward at any moment and out of range if I need to.
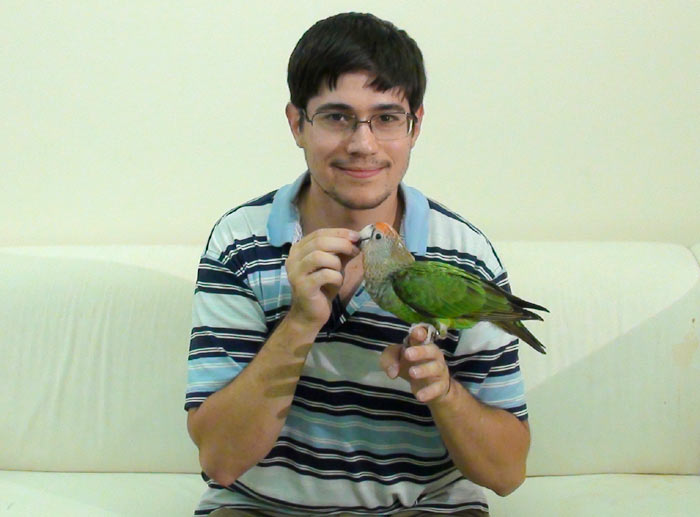
Besides the fact that this is the safest place to touch, the parrot is actually likely to enjoy it. It's one of the places they can't reach to scratch when they want to. The parrot will really like you for scratching off bits of food stuck or beak that is flaking off. So the act itself becomes positively reinforcing. The parrot will learn to remain calm and let you handle its beak. This serves as a behavior alternative to biting. Any attempt at biting will be negatively punished by the termination of beak scratches. As the parrot becomes more accustomed to this sort of hand to beak relationship, it will be less likely to bite the hands because it is used to hands touching the beak rather than the other way around. I'm not suggesting that this will eliminate biting all together. Other taming methods are certainly required, but this is a great supplement to them.
As you touch the parrot's beak more and more, you will develop more confidence around it yourself. Both you and your parrot will have less fear of each other. While you worry about the parrot using the beak for biting, the parrot also fears you using hands for grabbing or hurting. But as you practice the beak touching/scratching, you will both learn that beak/hands are not meant for harm. As you gain more confidence you can scratch the lower mandible as well and move on to the cheeks and head.
Besides the mutual trust this technique develops, it also serves a practical application. This allows you to file your parrot's beak if needed and to scratch off any dirt. So instead of fearing your parrot's beak, turn that around to a game that results in positively reinforcing beak scratches for your parrot.
Last time I brought Kili to the street carnival I discovered that one of her new primary feathers was out of alignment on her bad wing. I kept trying to figure out what was wrong with it and couldn't tell if it was broken. This one had just grown in and was the first feather from her second molt to grow on the wing missing all but one primary. All of the other primaries (except for outer most one) broke off since her first molt.
Later that evening I spotted the new feather completely rotated 180 degrees and essentially connected upside down. I figured it must have broken across the quill but I could not find any damage. I gently pulled and it came right out. The quill was still intact and there was some blood. This feather was just changing from the blood feather to mature feather stage. I was really disappointed because I was really counting on this feather to give support to the one remaining primary and to give protection for when that one molts.
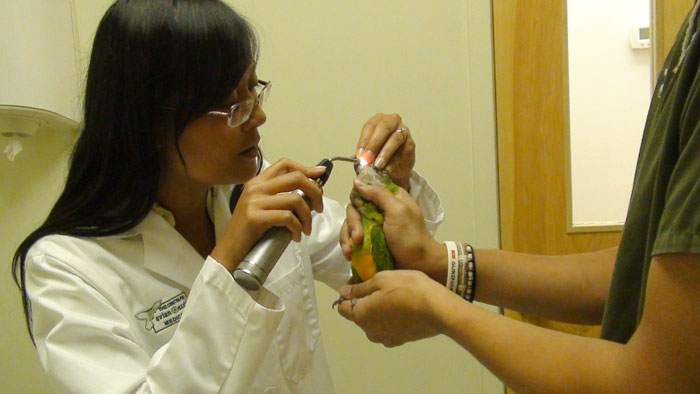
I had been considering bringing Kili to the new vet that I have been using for Truman and had mentioned to them Kili's wing condition previously. At this point with a freshly broken primary I decided it would be a good time to bring her in for analysis. I was also a bit concerned that there could have been some irritation or infection where the new feather broke out from. From my own research and consultations I have received, I figured this was just a case of post-clip regrowth trouble but I was still worried in case there was any kind of actual problem.
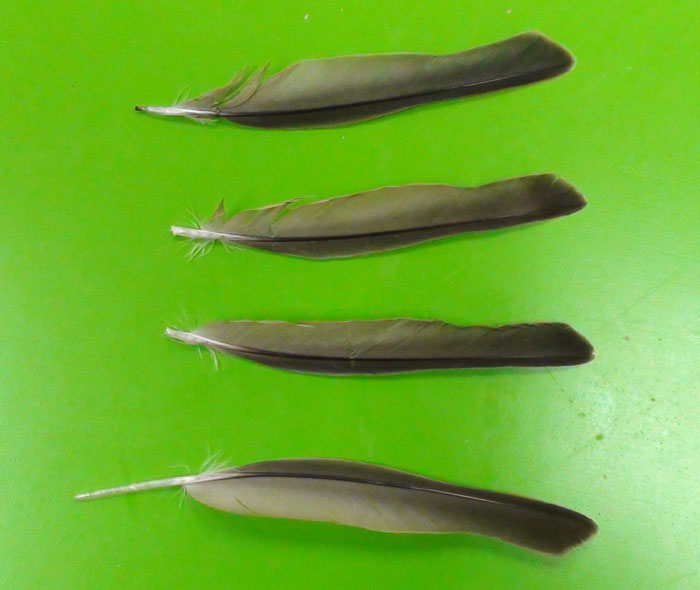
You can see recently fallen feather on top, broken feathers in middle, and intact molted feather on bottom
Kili behaved very well and everyone was amazed at how tame she is. They didn't need to towel her, just a normal grab and head restraint did the trick. She showed all signs of being a healthy parrot. I brought in samples of broken primary feathers, intact, and the newly fallen one. The vet examined the feathers and Kili's wings but could not find any abnormalities. My earlier suspicions were confirmed that the lack of support from additional primaries causes the remaining ones to break. There is nothing that can be done about it and no dietary changes are needed.
The vet proposed to take a blood test to check for Polyoma or PBFD as they can cause feather problems. But I pointed out that the other wing is in excellent condition and that the disease should probably apply symmetrically. Nothing else can be done to stimulate or check the feather follicles so it is only a matter of chance and time that Kili mends her wings.
To justify the visit I asked if they could trim Kili's talons. They have become razor sharp and she was really doing damage to my skin by that point. The vet requested her assistant to bring out the dremel. I was shocked that they would apply a tool 3 times the size of the bird and asked if they could use scissors instead. The vet used an ordinary nail clipper and barely removed anything at all. While the groomer at the bird store I bring Kili to can do an outstanding job, even I can trim a lot more than that. The vet barely took 1/32" off and I'm sure they'll be back to where they were in a week. The reason I don't like doing it myself is because I get really stressed out and worried about cutting too far but generally get it spot on. But it takes me an awful long time to do it because I reward each clip and am super careful. I thought the vet would at least trim as much as I do if not even more but this kind of trim job really did not help much at all. This reaffirmed to me that the bird store is the most skilled and practiced when it comes to grooming. I would estimate that the groomer at the store will take about 1/8" off at a cut, I'll go as far as 3/32", but the vet did a mere 1/32". I could do that much in a single session of hand filing but I find that a good cut makes the talons bluntest.
I am relieved to find out that there is nothing wrong with Kili but disappointed that there is absolutely nothing that can be done. It's been hard on her because she still flies with one whole wing but the other wing is pretty helpless. Right now I'm taking it easy with her and avoiding flight training. I'm feeding her abundantly in hopes that this molt will bring fresh primaries and help build her wing up. When she has her wings back, then we can always go back to flight training.
To finish off the vet visit Kili impressed the vet with how smart she is. She did wave, shake, nod, hello, wings, and play dead. There was no need for treats, Kili was just happy to be such a show off.
Trained Parrot is a blog about how to train tricks to all parrots and parakeets. Read about how I teach tricks to Truman the Brown Necked Cape Parrot including flight recall, shake, wave, nod, turn around, fetch, wings, and play dead. Learn how you can train tricks to your Parrot, Parrotlet, Parakeet, Lovebird, Cockatiel, Conure, African Grey, Amazon, Cockatoo or Macaw. This blog is better than books or DVDs because the information is real, live, and completely free of charge. If you want to know how to teach your parrot tricks then you will enjoy this free parrot training tutorial.
Trained Parrot site content Copyright 2010-2020 Michael Sazhin. Reproduction of text, images, or videos without prior permission prohibited. All rights reserved.