Macaws:
Red Shouldered (Hahn's) Macaw
Severe Macaw
Blue And Gold Macaw
Blue Throated Macaw
Military Macaw
Red Fronted Macaw
Scarlet Macaw
Green Winged Macaw
Hyacinth Macaw
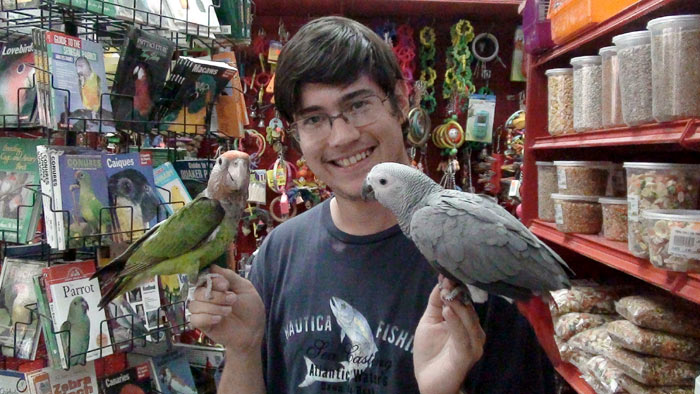
Over the weekend I went to the parrot store to pick up some supplies. I brought Truman along for the hour each way car ride in his carrier. It is good for him to become more accustomed to spending periods of time in his carrier and in the car. At the store I took him out of his carrier. I was quite nervous at first that he would start flying around the store. He is still a novice flyer and there are many things that he could bump into or knock over at the store. I brought his harness along with me just in case but decided to test his behavior before putting it on.
I took Truman out of his carrier. He was certainly alert and curious but relatively relaxed. I let him observe things while keeping a close hand to grab him before he could fly off. As time went by I began loosening my grip on his feet and became less concerned. I showed Truman to the employees and let them handle him. This is all good socialization for the parrot. Eventually I will be bringing Truman to this store to get his nails trimmed but rather than start with a stressful experience of having the procedure done, I wanted to give him a peaceful introduction. Furthermore this is his immunal outing as well. Since Kili came from that store and I purchase a lot of my parrot supplies from that store, it's better that Truman be microbialy familiar with that environment and develop an immune system for it. We have progressively worked toward this for some time. First of all Kili comes from that store and his introduction to Kili was the first stage. Then I've been putting fresh toys and perches from that store in his cage. And finally I brought him there all together.
I picked up an African Grey Parrot and held Truman up to the Grey to compare size. I'd never seen a Grey and Cape Parrot together before so this was an interesting moment for me to compare. I was split for some time between an African Grey and a Cape but I think this interaction reinforced that I made the right choice. Many of the employees at the store had never seen a Cape Parrot before. While I think the owner was a bit jealous that I didn't buy from her, the fact that she doesn't sell Capes or flighted parrots probably settled it. To make up for this, I bought some perches and a 25lb bag of bird food.
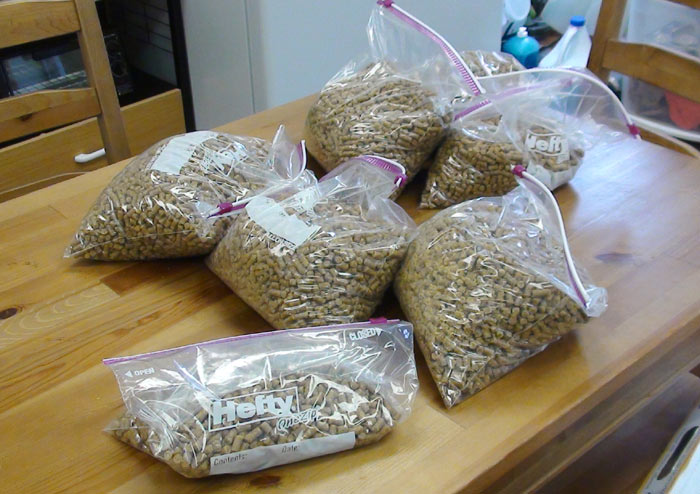
I brought the huge bag of pellets home and divided it up into smaller portions to freeze. I ended up filling 7 ziplock bags and they took an entire shelf of my freezer. Now I won't have to worry about buying pellets for over a year. I would never have done this with Kili alone but since both parrots now eat the same pellets this has become economical. Truman eats about 3 times as much as Kili so between the two of them, a 2.5lb bag gets used up in a month. That would require me to buy a bag of pellets every month. Not only is that inconvenient but also quite pricey. The 25lb bag cost about $55 while the regular 2.5lb retail bags cost $14 each. $55 vs $140 is a pretty significant saving at merely the cost of some freezer space and bags. So I recommend buying pellets in bulk for owners of large parrots or who own multiple parrots.
Here is an article for the very beginners. This is not an article about actually teaching a parrot to step up, refer to this one for more information about actually training this. This one is about the actual approach to requesting a trained parrot to step up. This is great for members of a household that has a parrot that steps up but want to know how to hold it, folks who bought a tame baby parrot and want it to step up, and just anyone wondering about good ways to hold them.
I've watched videos online, seen people (who claim to be parrot owners) try to pick my birds up, and watched people at the bird store trying to handle the birds. I have amassed many observations of people approaching parrots the wrong way and it won't step up or even bites. Meanwhile I could reach for the same parrot and it steps right up. It's not because the parrot has a specific thing for me and not them but rather because I've developed a universal approach to picking up parrots whether mine or other. I was very disappointed not to have an article like this available to teach me how to hold a parrot when I bought my first and had no prior experience so I would like to share what I've learned with you.
First and foremost, you don't want to leave a bad first impression on the parrot. Avoid making any sudden moves anywhere in the presence of the parrot. This includes both within sight and earshot. If you slam the door, even though your parrot may not have seen it, it may be in a nervous/jumpy mood and picking it up will be more difficult. Always err on the side of being too cautious because if you succeed in interaction, you can slowly be more and more abrupt/normal and it won't bother the parrot, but if you leave a bad first impression it may develop a fear of you. Give the parrot time to adjust at first sight. Don't go straight for the parrot after entering the room. Go about and do some things on your own and slowly work your way closer to the parrot. Of course if you have an existing relationship this may not be necessary but if you are visiting someone else's parrot or this one is new to you, these are definitely things you'll want to do.
Now, once you have established a calm presence in front of the parrot, you can approach for the step up. At this stage the parrot might be on a stand, in the cage, or on someone's hand. It doesn't particularly matter what it is actually standing on as your approach should be roughly the same. Slowly walk toward the parrot watching for any signs of fear or aggression. Assuming the parrot is calm, proceed closer and closer. Stop and stand at half an arm's length from the parrot and reach your arm (right/left handedness doesn't matter, use what is convenient) away from the parrot at first. For small parrots reach out your index finger and tuck the rest of your fingers down. For a larger parrot use your wrist or entire arm. Aim the back of your hand toward the parrot so there is less available to bite or nip. Now from a distance your parrot will already see the cue for stepping up and it will come as no surprise that it is what you want. If the parrot is adamantly against this, you will know before your fingers are close enough to get chomped because you are taking your time approaching the parrot.
Move the hand toward the parrot at a slow but steady pace. This way the parrot has time to think and act. Aim for just above the legs but don't hold your hand at beak height as that will encourage nipping. Parrots don't step down well so definitely don't aim at the feet or below. Once you are within beak length from the parrot, there is no backing down. Bite or not, at this point you have to bring the hand close enough for it to step up. If you back off at this point, the parrot will learn to bite whenever it doesn't feel like stepping up and you'll have a much bigger problem. The time for changing your mind was before you got close enough if the parrot was showing any aggressive body language. If the parrot does start to bite, keep pressing in toward the parrot and that will force it to step up and stop biting. By leaning into the bite you overwhelm the parrot and it should relax the bite. Assuming the parrot doesn't bite, once your hand is close enough it should step up. If it does not, continue moving your hand toward the parrot and gently press on the belly until it begins to lose its balance and is forced to step up. Once the bird is on your hand, be sure to move your arm slowly and gently the rest of the time because you don't want the parrot to develop a terrible association of being on you.
As for grabbing a parrot, once again assuming the behavior is already learned by the parrot and it is strictly a matter of transferring to another person, use the same approach as for step up except swinging your arm from behind and slightly above the parrot. Keep your hand open with the thumb swung out to form a cradle that the parrot will be grabbed in. When you grab, squeeze from the sides onto the wings/shoulders but never hold by the belly because that will restrict breathing. Alternatively you can grab by the neck by holding your thumb to index finger together just under the beak. Not only does this keep the parrot firmly in your hand, it also prevents biting. This is a good grip to use for maintenance behaviors such as clipping nails or checking the wings. Don't actually squeeze the neck but rather make a circle between the thumb and index finger to keep the parrot from sliding out because the head is thicker than the neck.
In conclusion, it is about having a collected and deliberate approach to holding the parrot. If the parrot is not afraid of you and senses that you will be picking it up no matter what, it is much less likely to refuse to step up than if you are shaky and uncertain. The parrot can tell all of this by how you move and act so be confident in yourself and don't be scared and you will be surprised by how much more cooperative the parrot will actually become.
Here is a video where I demonstrate these methods and different ways of holding small and medium sized parrots:
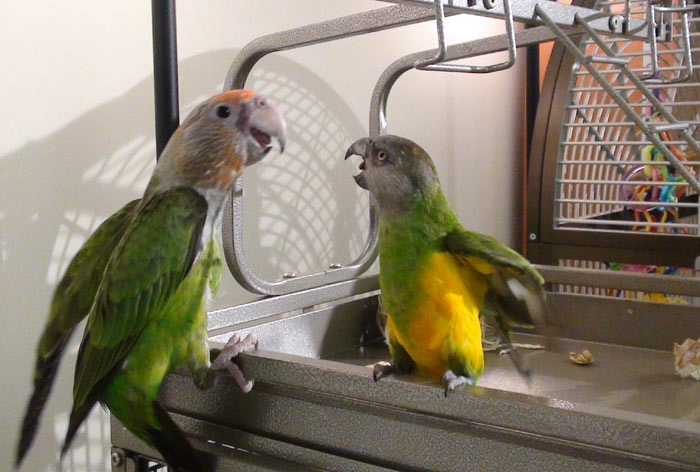
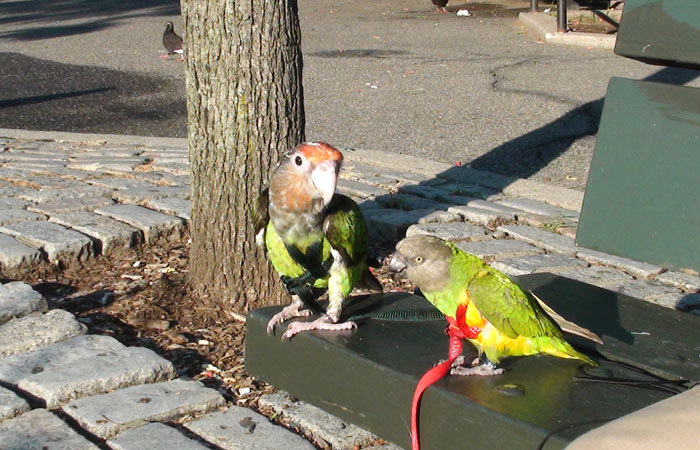
Kili and Truman are definitely getting along much better overall. However, it's at the park where they do great together. They can sit side by side with their wings rubbing against each other and not even fight. At home there can be a squabble here and there but nothing too bad.
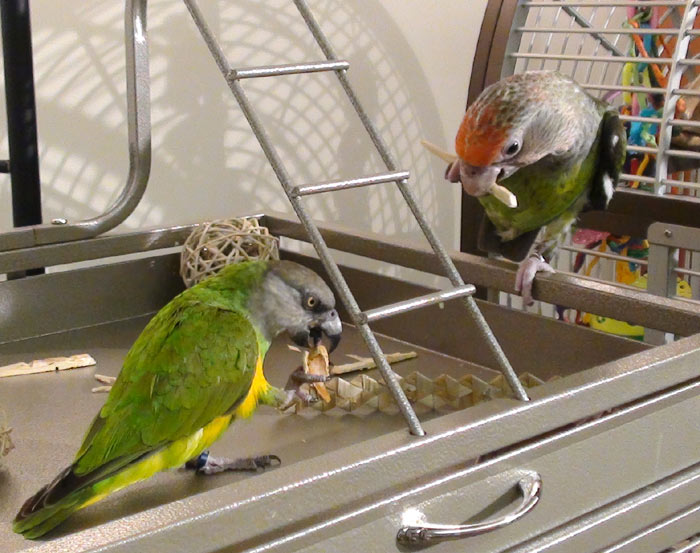
Parrots playing together on Kili's cage top
Kili dreaming of stealing Truman's toy
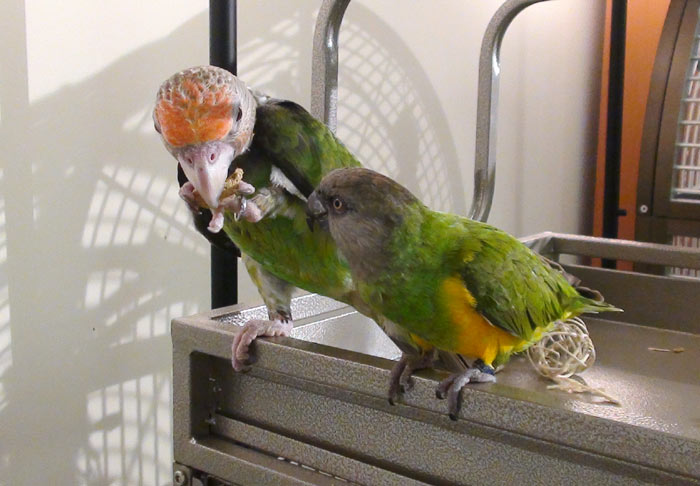
Parrots get in fight when Kili tries to steal toy
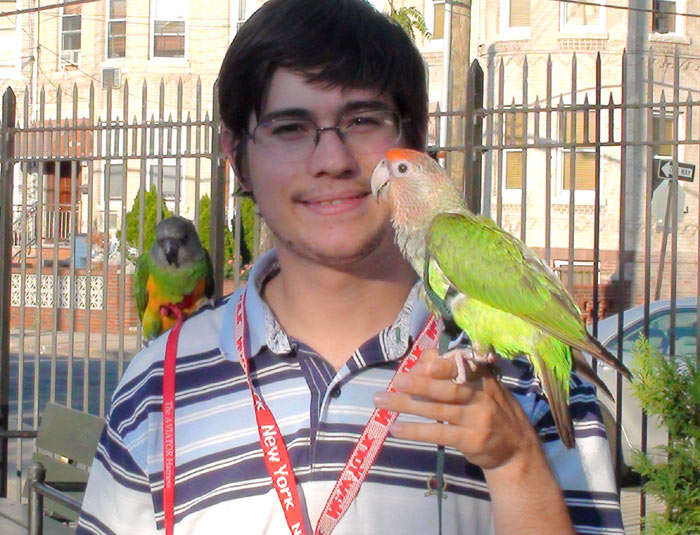
Taking my parrots to the park
Senegal Parrot and Cape Parrot getting along sitting outside together
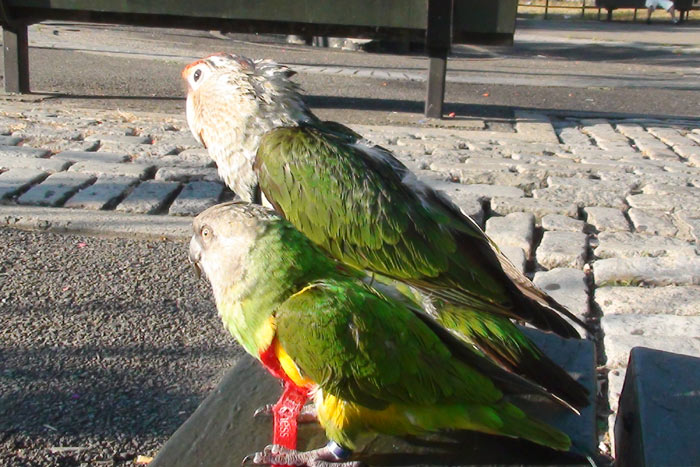
Huddled shoulder to shoulder drying from a shower
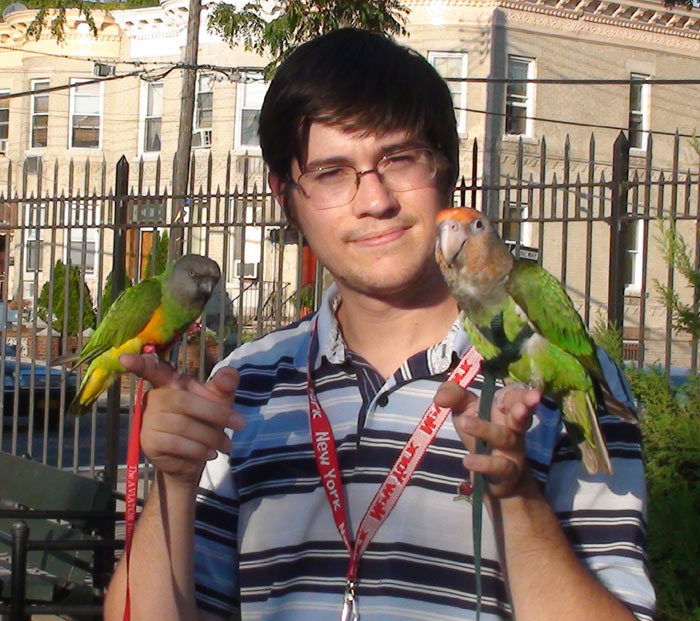
My parrots and I at the park
Here is a video of my parrots behaving at a family outing I took them to. They say together on the same chair back without the slightest trouble. This is why it's great to take your birds places. They are much less aggressive to each other and to other people and it's a great way to socialize them overall.
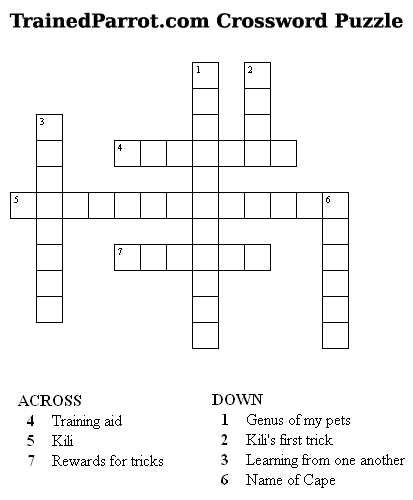
How well do you think you know my parrots? Here is a crossword puzzle to see if you've been paying attention to my videos and articles. Feel free to post your answers in the comments section.
For the long term, I wasn't particularly thrilled with the way the carrier Truman came in was set up. So I decided to start over and make a new one specific for him. I started by purchasing a small cat carrier at a typical pet store. Assembly was just the beginning of the makeover this carrier was about to get.
The first step for transforming a carrier into a parrot carrier is to add a perch. I went through some of Kili's old perches and found just the right one for Truman. I measured the best position for the perch and drilled a hole so that I could bolt the perch on to the carrier. Then I drilled additional holes near the top mesh door and front door. I use these holes to add an additional clasp to each door. My parrots are flighted so I take additional precautions in the event the carrier door fails or is coerced (by the parrot). I also use zip ties to secure every carrier clasp shut
I later added a food bowl ring to the carrier for being able to drop a food bowl in. I hung a toy from the cage top mesh and added a paper towel under the perch. The carrier was ready to go for testing. I brought Kili and Truman out for a family event in their respective carriers. I didn't feed them in the morning but instead let them eat in their carriers when I arrived. They were both hungry and ate marvelously. This served as an additional reward for being good in their carriers.
I much prefer the top loaded carriers with a door on the top than the classic side door only ones. Not only do I find it easier to clean the carrier this way, but it is also much easier getting the parrot in and out. By opening the top I can reach the parrot no matter where it is in the carrier and it can step up. Whereas with a side door design, you have to wait for it to come out or reach deep inside for it. Also it is easier to add toys and food bowls through the top down as well. So I definitely recommend spending the little bit extra and getting a top door (or two door) carrier than a side door only design.
Here is a video of the entire assembly process and all of the modifications I made for my parrot's new travel carrier.
Trained Parrot is a blog about how to train tricks to all parrots and parakeets. Read about how I teach tricks to Truman the Brown Necked Cape Parrot including flight recall, shake, wave, nod, turn around, fetch, wings, and play dead. Learn how you can train tricks to your Parrot, Parrotlet, Parakeet, Lovebird, Cockatiel, Conure, African Grey, Amazon, Cockatoo or Macaw. This blog is better than books or DVDs because the information is real, live, and completely free of charge. If you want to know how to teach your parrot tricks then you will enjoy this free parrot training tutorial.
Trained Parrot site content Copyright 2010-2020 Michael Sazhin. Reproduction of text, images, or videos without prior permission prohibited. All rights reserved.

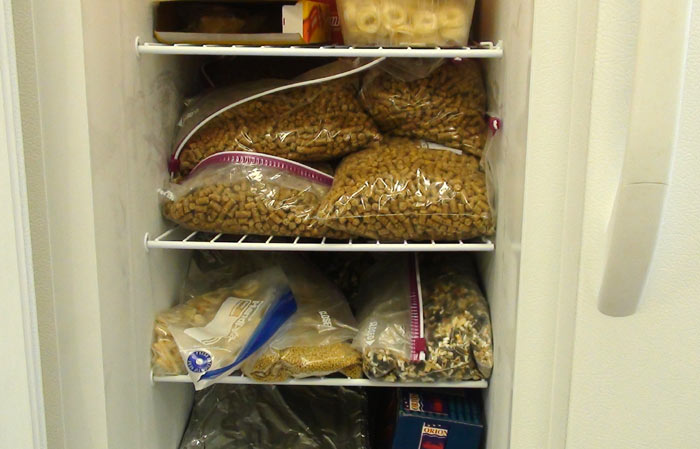 2 shelves in freezer for pellets and bird treats